TL;DR
-
The main fiber testing methods are visual inspection, visual fault location, optical loss testing (OLTS), and OTDR analysis, each catching a different fault from dirty connectors to breaks along the run.
-
Fiber certification follows two tiers under ANSI/TIA-568.3-D: a required Tier 1 loss test with an OLTS (insertion loss, length, polarity), plus an optional Tier 2 OTDR test for event-level detail.
-
A fiber test passes when insertion loss (signal lost end to end) and return loss (light reflected back) fall within the link's loss budget, with lower insertion loss and higher return loss being the goal.
The majority (90%) of businesses lose more than $300,000 per hour of downtime,1 underscoring how network performance directly impacts an organization’s bottom line. Reliable cabling is the foundation of a strong network, and proper fiber optic testing is your first line of defense against costly outages.
As a nationwide provider of managed network services, TailWind performs fiber testing across hundreds of sites to help multi-location businesses stay connected with confidence. In this guide, we’ll walk through how to test fiber optic cable and best practices to simplify your next fiber test.
Why Does Fiber Optic Testing Matter?
Fiber internet offers better speed and performance than copper options, but the cables are very sensitive to bending, contamination, and physical damage. What you may think is a small defect in one cable can cause problems like signal loss and spotty connectivity across your entire network.
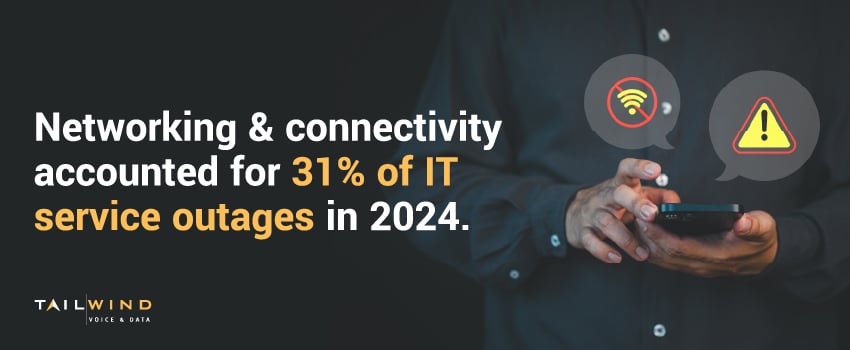
Networking and connectivity accounted for 31% of IT service outages in 2024.2 Unfortunately, these incidents often stem from infrastructure issues that fiber testing could have prevented. That’s why routine fiber optic test procedures are essential for new installations and ongoing maintenance – they help keep the operations that drive your business running smoothly.
What Is A Fiber Optic Test?
Before diving into specific tools and methods, you need to understand what fiber testing hopes to accomplish. A typical fiber optic test should:
- Verify that signal loss is within acceptable thresholds
- Check for breaks, bends, or defects in the cable
- Confirm the connectors and splices are clean
- Document baseline performance for future comparison
TailWind’s field service teams follow industry best practices and use certified equipment to meet these objectives – ensuring your fiber network is installation-ready or pinpointing exactly where performance issues are hiding.
Fiber Test Methods: Common Approaches
Different testing methods serve different purposes. Here are the most common fiber optic testing methods used by network professionals:
Visual Inspection
Conducting a visual inspection test involves using a fiber scope or microscope to examine the endfaces of connectors for dirt, scratches, or cracks.
- Best for: Routine cleaning and validation during install
- Why it matters: Dirty connectors are one of the most common causes of fiber issues
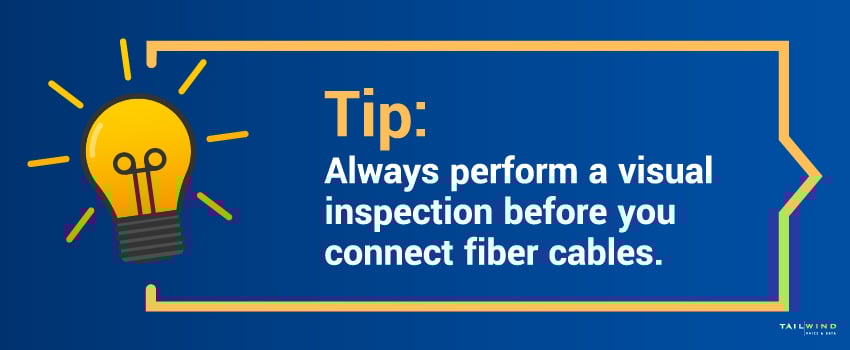
Always inspect before you connect. Cable contamination can also damage your equipment, turning a preventive measure into an expensive repair.
Visual Fault Locator (VFL)
A VFL device injects visible red laser light into the fiber. If there's a break or sharp bend, the light will escape, making the fault visible.
- Best for: Locating breaks, bad splices, and macrobends
- Why it matters: Techs get visual feedback without complex equipment
TailWind’s field techs often use VFLs as part of a quick diagnosis toolkit before deploying more advanced tests. The immediate feedback helps determine next steps.
Optical Power Meter & Light Source (OLTS)
OLTS tests use a light source at one end of the cable and a power meter at the other to measure how much signal loss occurs as light travels through the fiber.
- Best for: Measuring insertion loss, especially in singlemode and multimode fiber
- Why it matters: Quantifiable cable performance data is important for setting a baseline
At TailWind, we use OLTS testing to verify fiber performance before go-live and document the results. These baseline measurements are essential when troubleshooting problems months or years down the road.
Optical Time Domain Reflectometer (OTDR)
An OTDR sends pulses of light into the cable and analyzes backscatter and reflections to detect issues like splice and connector losses, bends, or breaks.
- Best for: Advanced diagnostics and troubleshooting
- Why it matters: Provides detailed visibility into the entire length of your fiber run
We use OTDR to diagnose performance issues in long runs, especially nationwide rollouts and campus-wide builds where field techs need visibility across multi-mile distances.
Tier 1 vs Tier 2 Fiber Certification Explained
The methods above map onto two certification tiers defined by the ANSI/TIA-568.3-D standard. Knowing which tier a job calls for tells you which tests you actually need to run.
Tier 1 (Basic) Certification
Tier 1 is the baseline certification most fiber installations require. It uses an OLTS to measure total insertion loss, link length, and polarity, confirming the link falls within its allowable loss budget.
Uses: OLTS (light source and power meter)
Measures: insertion loss, length, polarity
Status: required under ANSI/TIA-568.3-D
Tier 2 (Extended) Certification
Tier 2 builds on Tier 1 by adding an OTDR to characterize each event along the link, such as individual splice losses, connector losses, and reflectance. It is listed as optional and is used for troubleshooting or when tight loss budgets leave little room for error.
Uses: OTDR (plus the Tier 1 OLTS results)
Measures: event-by-event loss, reflectance, fault location
Status: optional, and it does not replace Tier 1
Tier 2 does not replace Tier 1. You complete Tier 1 first, and an OTDR result alone is not accepted for certification under TIA. At TailWind, we run Tier 1 certification on new installs and add Tier 2 when a project needs event-level detail across long runs or campus builds.
Insertion Loss vs Return Loss In Fiber Testing
Fiber tests produce two loss measurements that tell you different things about a link's health: insertion loss and return loss.
Insertion Loss
Insertion loss is the total signal power lost as light travels from one end of the link to the other, measured in decibels (dB). It adds up the loss from the fiber itself plus every connector and splice along the way. Lower is better. High insertion loss means the signal is arriving weak, which shows up as slow or unreliable connections.
Return Loss
Return loss, also called optical return loss (ORL), measures how much light reflects back toward the source instead of continuing down the fiber. Here, higher values are better, because they mean less light is bouncing back. Strong reflections interfere with laser transmitters and degrade high-speed links, so return loss matters most on the fast connections enterprises depend on.
Both measurements only mean something against a loss budget: the maximum loss a link is allowed based on its length, connectors, and splices. A test passes when the measured loss stays within that budget and fails when it goes over. This is what it means to verify that signal loss is within acceptable thresholds, and it is why documenting baseline results matters for comparison later.
4 Best Practices For Fiber Testing
Effective fiber testing goes beyond owning the right tools. Here are the best practices our techs follow during every project:
1. Use Clean Equipment & Test Cords
Contamination at any point in the test setup can produce misleading results. A small amount of dirt that you don't notice can skew your results and send you looking for problems that don't actually exist. TailWind cleans all connectors and equipment before each test to prevent false diagnoses and ensure your test results are trustworthy.
2. Document & Label Everything
When a cabling issue arises, proper documentation gives you baseline data to help identify what changed. This documentation also supports your compliance obligations and provides evidence that you took proper care of your infrastructure. At TailWind, we label each fiber link and document test results so there's always a clear record of performance.
3. Follow Industry Standards
Cabling standards exist because they reflect best practices developed across the industry. Adhering to them means your network will perform consistently and reliably in different situations. We test against standards like TIA-568.3-D to ensure your fiber cabling meets or exceeds recommended guidelines.
4. Test At The Correct Wavelength
Fiber carries different wavelengths, and testing at the wrong one produces misleading results. Always test at the wavelengths your network actually uses, and match them to your fiber type. Multimode fiber is typically tested at 850 and 1300 nm, while singlemode is tested at 1310 and 1550 nm. Testing at the correct wavelength gives you numbers that reflect real-world performance, not a lab condition your traffic will never see.
When Should You Perform A Fiber Optic Test?
Not sure if it’s time for a fiber test? Here are some scenarios that call for fiber optic testing:
- After Installation: Certify cable performance before turning up services to prevent going live with undiscovered problems.
- After Repairs: Confirm restoration was successful and that the repair didn't introduce new issues.
- During Maintenance: Track changes in performance to see when cables are degrading and when replacement or repair is needed.
- When Troubleshooting: Identify the root cause of signal loss or failure.
TailWind integrates fiber test procedures into our structured cabling projects, field service repairs, and managed network rollouts across the country.
Fiber Testing Methods FAQs
What Are The Methods Of Fiber Testing?
The main fiber testing methods are visual inspection, visual fault location, optical loss testing, and OTDR analysis. Visual inspection uses a fiber scope to check connector endfaces for dirt or damage. A visual fault locator (VFL) sends red laser light through the fiber to reveal breaks and sharp bends. An optical loss test set (OLTS) measures total signal loss across the link. An OTDR sends light pulses down the fiber to map events like splices, connectors, and breaks along its entire length. Most projects combine several of these for full coverage.
What Is The Difference Between Tier 1 And Tier 2 Fiber Testing?
Tier 1 and Tier 2 are the two certification levels defined by the ANSI/TIA-568.3-D standard. Tier 1 (basic) certification uses an OLTS to measure total insertion loss, link length, and polarity, and it is the required baseline for most installations. Tier 2 (extended) certification adds an OTDR to characterize each event along the link, such as individual splice and connector losses, and it is optional. Tier 2 does not replace Tier 1: you complete Tier 1 first, and an OTDR result alone is not accepted for certification under TIA.
What Is The Difference Between Insertion Loss And Return Loss?
Insertion loss measures the total signal power lost as light travels from one end of a fiber link to the other, adding up losses from the fiber, connectors, and splices. Return loss, also called optical return loss (ORL), measures how much light reflects back toward the source instead of continuing forward. The key difference is direction: insertion loss is about light that fails to arrive, while return loss is about light that bounces back. For insertion loss, lower values are better, and for return loss, higher values are better.
What Are The Standards For Fiber Optic Cable Testing?
Fiber optic cable testing is governed by standards from a few key bodies. In North America, TIA (notably ANSI/TIA-568.3-D) sets the requirements for fiber system design, installation, and testing, including the Tier 1 and Tier 2 certification levels. The IEC publishes international standards such as the IEC 61280 series covering test procedures and parameters. ISO, often through ISO/IEC 11801 and 14763-3, provides related cabling and testing standards used globally. Testing to these standards is what makes results consistent, comparable, and acceptable for certification and warranty purposes.
Can An OTDR Test A Fiber?
Yes. An OTDR (optical time domain reflectometer) tests a fiber by sending pulses of light down the cable and analyzing the light that scatters and reflects back. From that data it maps the entire length of the fiber and pinpoints events such as splices, connectors, bends, and breaks, along with the loss at each one. This makes an OTDR especially useful for troubleshooting and for Tier 2 certification. It does not replace an OLTS for measuring total insertion loss, so the two are often used together.
How Much Does A Fiber Tester Cost?
Fiber tester cost varies widely by capability. A basic visual fault locator or inspection tool can run from around $50 to a few hundred dollars. A budget handheld OTDR for field troubleshooting can start near $150 to $500, while a certification-grade OTDR for Tier 2 work ranges from several thousand dollars up to $18,000 or more. An optical loss test set (OLTS) for Tier 1 certification typically costs a few thousand dollars. Certification gear also needs annual calibration, so many multi-location businesses use a testing provider instead of buying and maintaining the equipment in-house.
Why Partner With TailWind For Your Fiber Optic Testing
Fiber performance issues can be hard to detect, but not with the right partner. Whether you’re wondering how to test fiber optic cable or need help diagnosing an outage, TailWind is here to help.
Our nationwide teams provide full lifecycle fiber services for multi-location enterprises, from structured cabling and installation to testing, troubleshooting, and ongoing support. With TailWind, you don’t just get a pass/fail report – you get hands-on support from experienced techs who know how to solve real-world problems across your entire footprint.
Get in touch with our team to schedule fiber testing, discuss a rollout, or request support for your existing infrastructure.
Sources: